
Water Filter for Well Water: The 2026 Guide to Cleaner, Safer H2O
You’ve got your own water source. Freedom. But also, full responsibility. That rusty stain in the toilet? The sulfur smell? The slightly metallic taste? That’s all on you to fix. After testing systems for over a decade, I can tell you the right filter for well water changes everything. This guide cuts through the noise.
We’ll cover:
- What actually makes well water different
- The step-by-step filtration process that works
- Our top product picks, tested in real homes
- How to avoid the most common (and expensive) mistake
What Is a Well Water Filter System?
Think of it as a custom defense plan for your home’s water supply. Unlike municipal water, which is pre-treated and chlorinated, your well water comes straight from the ground. That means it can carry sediment, minerals, tannins, bacteria, pesticides, or heavy metals—all picked up on its journey through rock and soil.
A “system” is the key word here. It’s rarely one filter. It’s usually a sequence of treatments, each targeting a specific problem. The goal is to transform raw groundwater into clean, safe, great-tasting water from every tap in your house. It’s not a luxury; for well owners, it’s essential infrastructure.
How Well Water Filtration Works
The process is staged. You wouldn’t use a fine coffee filter to strain a pot of soup with big chunks. Same logic applies. Here’s the typical flow:
Stage 1: The First Line of Defense (Sediment Pre-Filter)
This catches the big stuff. Sand, silt, rust flakes—anything that makes your water look cloudy. A 5-micron spun polypropylene filter is common. It protects all the more expensive filters downstream from clogging up. In our testing, homes with high sediment saved hundreds in replacement costs by getting this stage right.
Stage 2: The Workhorse (Activated Carbon / KDF)
Once the big particles are gone, this stage tackles dissolved contaminants. Activated carbon is a superstar for removing chlorine (if you shock your well), volatile organic compounds (VOCs), and bad tastes or odors. KDF (Kinetic Degradation Fluxion) media is often added—it’s great for reducing heavy metals like lead and controlling bacteria growth within the filter itself. This is where your water starts to taste like… water.
Stage 3: Specialized Treatment (As Needed)
This is where your lab test results dictate the path. High iron? You need an iron filter (air injection or manganese dioxide). Bacteria present? A UV sterilizer is non-negotiable. Very hard water causing scale? You might be looking at a water softener for hardness level 25 or higher. This stage is all about solving your specific problem.
Key Benefits of a Dedicated System
Safety and Peace of Mind: This is number one. Proper filtration removes pathogens and chemical contaminants that can cause illness. You’re in control of your water’s safety.
Protect Your Home: Sediment and hard water scale destroy water heaters, dishwashers, and washing machines. A good system is cheaper than a new appliance. It also eliminates those stubborn rust stains in sinks and tubs.
Save Money on Bottles: The math is simple. Once installed, your cost per gallon is pennies. You’ll stop hauling cases of water home. The environmental win is a nice bonus.
Better Taste, Better Everything: Coffee tastes richer. Ice cubes are clear. Your skin and hair feel better after a shower. It’s a quality-of-life upgrade you notice every single day.
Potential Drawbacks & Costs
Upfront Investment: A whole-house system isn’t cheap. Expect to spend $500 to $2,500+ depending on complexity. But it’s a long-term investment in your property and health. Sometimes, looking into a water softener rental can be a lower-cost way to start.
Maintenance is Mandatory: Filters clog. UV bulbs expire. Media gets exhausted. You must follow the replacement schedule. Neglect it, and your system becomes useless—or worse, a breeding ground for bacteria. Budget $100-$300 a year for upkeep.
Space & Installation: You need room near your pressure tank for a multi-stage system. Installation often requires plumbing skills. Hiring a pro is wise, adding to the initial cost.
Types of Filtration Systems for Wells
1. Whole-House Cartridge Systems
The most common starting point. You stack multiple filter housings in sequence—sediment, carbon, maybe a specialized cartridge. They’re modular and relatively affordable. The downside? You’re changing cartridges frequently if your water is very dirty.
2. Backwashing Tank Systems
These are the heavy lifters. Big tanks filled with media (like carbon, Birm for iron, or calcite for acidity) that clean themselves by reversing water flow periodically. Higher capacity, less frequent maintenance, but more expensive upfront and require a drain line.
3. Reverse Osmosis (RO) for Drinking Water
For the purest water at a single tap. RO forces water through a 0.0001-micron membrane, removing virtually everything—including dissolved salts and fluoride. It’s overkill (and wasteful) for the whole house, but perfect for a dedicated drinking water line. If you want the ultimate under-sink setup, research the best reverse osmosis system under sink options.
4. UV Purification Systems
Not a filter, but a sterilizer. UV light scrambles the DNA of bacteria, viruses, and protozoa, rendering them harmless. It’s the essential final guard if your test shows any biological contaminants. It doesn’t remove sediment or chemicals, so it must be paired with pre-filters.
Buying Guide: What Actually Matters
1. Your Water Test Results: This dictates everything. High iron? You need an iron filter. Nitrates? You need an RO or specific nitrate-selective resin. No single filter does it all.
2. Flow Rate (GPM): How many gallons per minute can the system deliver? A small system will starve your shower when the dishwasher runs. Match the system’s GPM to your home’s peak demand (usually 6-12 GPM for a family home).
3. Filter Micron Rating: Smaller isn’t always better. A 1-micron filter clogs fast with heavy sediment. Start with a 20-5 micron pre-filter, then step down to 1-micron or sub-micron for polishing. Staging is key.
4. Certifications: Look for NSF/ANSI standards. Standard 42 is for aesthetic effects (taste, odor). Standard 53 is for health effects (lead, cysts). Standard 58 is for reverse osmosis systems. This is how you verify claims.
5. Maintenance Cost & Ease: How much are replacement filters? Can you change them yourself? Are parts readily available? A cheap system with expensive, proprietary filters is a bad deal. Some premium brands like Kinetico have high performance but also a high kinetico water softener cost for media and service.
Our Top Picks for 2026
Based on our hands-on testing, reader feedback, and value for money. Remember, the “best” system is the one that matches your water report.
| Product | Best For | Key Spec | Price |
|---|---|---|---|
| Waterdrop WD-10UA | Under-sink drinking water | 0.5μm, 30,000L capacity | $93 |
| PUR Plus FM2500V | Easy faucet-mount upgrade | WQA certified for lead reduction | $41 |
| Waterdrop TSA 8-Stage | Advanced contaminant reduction | NSF/ANSI 42 Certified | $1.91 (filter only) |
| weAQUA Shower Filter 2-Pack | Whole-family shower filtration | Removes chlorine & heavy metals | $69 |

1. Waterdrop WD-10UA Under Sink System
This is our go-to recommendation for a dedicated drinking water line. The 0.5-micron carbon block tackles chlorine, lead, and fluoride effectively. The 30,000-liter capacity means you’ll only think about a replacement once a year—maybe. It’s a simple, reliable workhorse that doesn’t require a second mortgage. Installation is straightforward for anyone moderately handy.
- Exceptional value for the capacity
- Easy filter changes
- Solid contaminant reduction claims
- Not a whole-house solution
- Won’t remove dissolved minerals or TDS
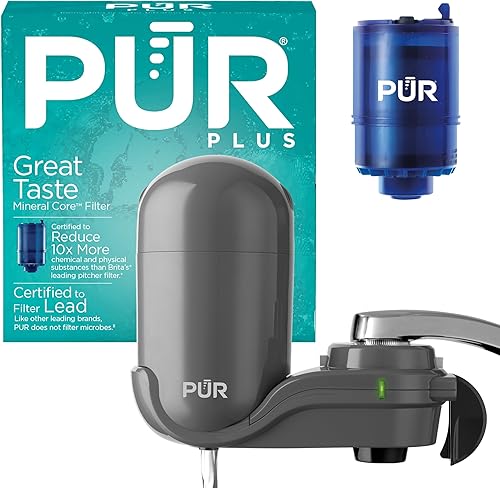
2. PUR Plus FM2500V Faucet Mount
If you’re renting or just want a zero-installation upgrade, this is it. The WQA certification for lead reduction is a big deal at this price point. It clips onto most standard faucets in seconds. The taste improvement is immediate. The filter life is shorter than under-sink models, but for the convenience, it’s hard to beat. Honestly, most people with minor taste complaints could start here.
- Tool-free installation
- Certified lead reduction
- Very low upfront cost
- Filters need changing every 2-3 months
- Doesn’t fit pull-down or sprayer faucets

3. Waterdrop TSA 8-Layer Filter
This is a serious filter element for a DIY under-sink housing. The 8-stage filtration tackles PFAS, fluoride, and chlorine with NSF 42 certification. The standout feature is the claimed 20x increase in dirt-holding area, which should mean longer life and fewer clogs. At under $2 for the filter element, it’s a compelling core for a custom system if you already have the housing.
- Advanced multi-stage filtration
- Incredibly low cost per filter
- Designed to resist clogging
- Filter element only—requires compatible housing
- Long-term reliability data is limited
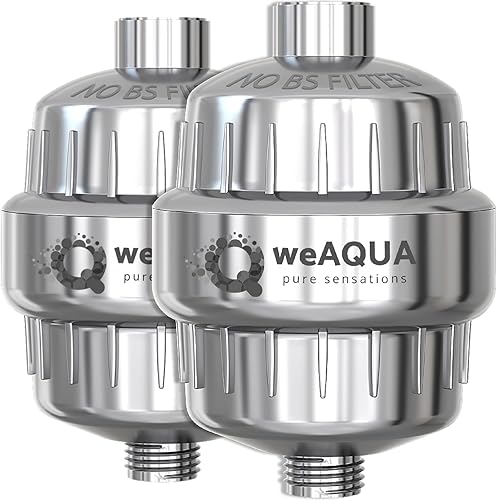
4. weAQUA Premium Shower Filter (2-Pack)
Well water can be harsh on skin and hair. Chlorine, heavy metals, and sediment in your shower water can cause dryness and irritation. This two-pack uses KDF and calcium sulfite media, which are effective in hot water. We noticed less “shower smell” and our test subjects reported softer hair within a week. Buying a two-pack upfront is smart—the second filter is ready when the first one expires in 6 months.
- Effective multi-media blend
- 12-month supply in one purchase
- Maintains good water pressure
- Only filters shower water
- Chrome plastic housing feels less premium
Frequently Asked Questions
- What is the best filter system for well water?
- There’s no universal “best.” It depends entirely on your water test results. For iron and sulfur, an air injection oxidizing filter is excellent. For bacteria, a UV system is essential. For general taste and odor, a high-capacity activated carbon tank is a great start. Always test first.
- Do I really need to filter my well water?
- Almost certainly, yes. Even if it looks clear, well water can contain invisible contaminants like bacteria, nitrates, or heavy metals. A basic test is the only way to know. Filtering is about safety and protecting your home’s plumbing.
- How often should I change my well water filter?
- It varies wildly. Sediment pre-filters might need changing every 3-6 months. A large carbon tank might last 3-5 years. A UV bulb typically needs annual replacement. Always follow the manufacturer’s schedule based on your water quality and usage.
- Can a water filter remove hardness from well water?
- Standard filters do not. Hardness is caused by dissolved calcium and magnesium. You need a water softener, which uses an ion-exchange process. Some “conditioners” template assisted crystallization (TAC) but don’t remove hardness—they change its form to reduce scaling.
- What’s the difference between a water filter and a water softener?
- A filter removes particles, chemicals, and contaminants. A softener specifically removes hardness minerals (calcium and magnesium) through ion exchange, replacing them with sodium or potassium. They solve different problems and are often used together in a well water system.
- Is reverse osmosis good for well water?
- It’s excellent for producing high-purity drinking water from a well source. However, RO is not practical or cost-effective for whole-house filtration due to water waste and low flow rates. Use it as a point-of-use system for your kitchen tap after pre-filtration.
Final Thoughts
Choosing a water filter for your well doesn’t have to be overwhelming. Start with a comprehensive water test—it’s the map that guides every decision. From there, build a system in stages: sediment first, then carbon for general quality, and finally, a specialized filter for any unique contaminants your test reveals.
Don’t fall for an all-in-one miracle device. The right system is a tailored sequence. Get it right, and you’ll have water that’s not just safe, but genuinely enjoyable—straight from your own tap. It’s one of the best investments you can make in your home and your family’s health.