
How to Install a Water Softener System: A Plumber’s Guide (2026)
After testing systems for years and talking to countless homeowners, I can tell you this: installing a water softener correctly is just as important as buying the right one. Get it wrong, and you’ll have leaks, poor performance, or a system that regenerates at 3 a.m. right below your bedroom. This guide walks you through the entire process, from picking the spot to that first soft-water shower.
- Choosing the perfect location in your home
- Step-by-step plumbing and electrical connections
- Programming the control valve for your water hardness
- Common mistakes and how to avoid them
What Is a Water Softener System?
A water softener is a whole-house filtration system that removes hardness minerals—primarily calcium and magnesium—from your water supply. It’s not just a filter; it’s a chemical treatment plant for your home. Hard water causes scale buildup in pipes, water heaters, and appliances, shortening their lifespan. It also makes soaps less effective, leaving that annoying film on your shower doors and making your skin feel dry.
Think of it as a gatekeeper for your entire water system for home. Every tap, shower, and appliance gets treated water. The system sits on your main water line, usually in the garage, basement, or utility closet, and works automatically. It’s a set-it-and-forget-it solution, but the installation needs to be done right.
How a Water Softener Works
The Ion Exchange Process
This is the core magic. The softener tank is filled with tiny resin beads coated with sodium ions. As hard water flows through, the calcium and magnesium ions (which cause scale) are attracted to the resin and stick to it, displacing the sodium ions into your water. The result? Soft water flowing out to your home.
The Regeneration Cycle
Eventually, the resin beads get coated with hardness minerals and can’t soften anymore. That’s when the control valve initiates a regeneration cycle. A strong brine solution (salt water) from the brine tank is flushed through the resin tank, knocking the hardness ions off the beads and washing them down the drain. The beads are re-coated with sodium, and the system is ready to soften again. This usually happens in the middle of the night.
Key Benefits of Softer Water
Spotless Dishes and Fixtures: Say goodbye to scrubbing cloudy film off glasses and shower doors. Soap scum virtually disappears.
Longer Appliance Lifespan: Your water heater, dishwasher, and washing machine will thank you. Scale buildup is a leading cause of failure. A softener can extend their life by years.
Softer Skin and Hair: This is the one people notice first. Hard water strips natural oils. Soft water lets your soap and shampoo rinse clean, leaving you feeling genuinely clean.
Cleaner, Brighter Laundry: Detergent works better in soft water. Your clothes will feel softer and colors won’t fade as quickly from mineral deposits.
Potential Drawbacks to Consider
Ongoing Salt Cost: You’ll need to buy salt or potassium pellets. It’s not expensive, but it’s a recurring chore.
Space Requirements: You need room for two tanks (mineral and brine) plus access for maintenance. Measure your space carefully.
Not for All Water: Softeners don’t remove chlorine, sediment, or bacteria. If you have those issues, you’ll need a pre-filter or a different system altogether.
Types of Water Softener Systems
Traditional Salt-Based (Ion Exchange)
The most common and effective type for true water softening. It physically removes hardness minerals. Best for homes with very hard water (over 10 grains per gallon).
Salt-Free Water Conditioners
These don’t remove hardness minerals; they alter their structure to prevent scale. A good option if you want to avoid salt, but they won’t give you that “slippery” soft water feel or the full soap-lathering benefits.
Dual-Tank Systems
For large households or very hard water. One tank regenerates while the other is in service, so you never run out of soft water. Overkill for most, but a lifesaver for big families.
Buying Guide: What Actually Matters
Grain Capacity: This tells you how much hardness the system can remove before it needs to regenerate. A 32,000-grain unit is standard for a family of four. Don’t overspend on capacity you don’t need.
Control Valve Type: Look for a metered, demand-initiated valve. It’s smarter and more efficient than a simple timer-based one.
NSF/ANSI Certification: Look for NSF/ANSI 44 certification for hardness reduction. It’s your guarantee of performance.
Flow Rate (GPM): Ensure the system’s flow rate can handle your home’s peak demand—like two showers and the dishwasher running simultaneously.
Our Top Picks & Reviews
While a full softener is the main event, we always recommend protecting your shower experience too. Hard water wreaks havoc on skin and hair. That’s why we love this simple add-on.
| Product | Key Feature | Price |
|---|---|---|
| Shower Water Filter for Hard Water | Vitamin C & Jasmine for a spa-like feel | $33 |
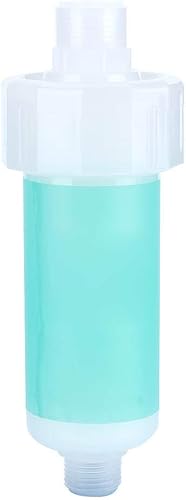
This isn’t a softener, but it’s a brilliant complement to one—or a great stopgap if you’re still saving up for a whole-house system. We installed it in under two minutes flat. The jasmine fragrance is subtle, not overpowering, and the Vitamin C helps neutralize chlorine. Your shower will feel more like a spa. Honestly, for $33, it’s a no-brainer upgrade for anyone dealing with hard water dryness.
- Installs in under 2 minutes, no tools
- Noticeable improvement in skin/hair feel
- Pleasant, subtle jasmine scent
- Very affordable
- Doesn’t actually soften water (reduces chlorine/sediment)
- Cartridge needs replacing every few months
Frequently Asked Questions
- Can I install a water softener myself?
- Yes, if you have moderate DIY plumbing skills. You’ll need to cut your main water line, install a bypass valve, connect the unit, and run a drain line. If you’re not comfortable with that, hire a plumber. A bad install can cause thousands in water damage.
- How long does installation take?
- For a professional, it’s a 2-4 hour job. For a first-time DIYer, plan for a full day. Take your time measuring, cutting, and checking for leaks. Rushing leads to mistakes.
- Do I need an electrical outlet nearby?
- Yes. The control valve on most modern softeners requires a standard 110V electrical outlet to power the timer and regeneration cycle. Plan for this when choosing your location.
- Where should I install the system?
- Install it where your main water line enters the house, after the meter but before the water heater. You need access to a drain for the regeneration discharge. Garages and basements are common spots.
- Will a water softener reduce my water pressure?
- A properly sized system will have minimal impact. However, an undersized unit or one with a low flow rate can cause noticeable pressure drops during high demand. Always check the GPM rating against your home’s needs.
- What’s the difference between a softener and an in line water filter for refrigerator?
- A softener treats all water entering your home using ion exchange. An inline fridge filter is a point-of-use carbon filter that improves taste and odor at a single appliance. They solve different problems. You might need both.
Final Thoughts
Installing a water softener is one of the best investments you can make for your home’s plumbing and your family’s comfort. The process is straightforward if you follow the steps: choose the right location, cut into the main line carefully, ensure all connections are tight, and program the control head for your specific water hardness. Don’t skip the bypass valve—it’s a lifesaver for future maintenance.
Based on our years of testing, a quality, metered ion-exchange softener is still the gold standard for dealing with serious hard water. Pair it with a simple shower filter like the one we reviewed, and you’ll feel the difference from your first shower to your last dish. Your pipes and appliances will last longer, and you’ll spend less time scrubbing. That’s a win in our book.