
How to Install a Soft Water System: The No-Nonsense Guide (2026)
After testing systems and talking to plumbers for years, I can tell you this: installing a water softener yourself is totally doable. It saves you hundreds. But there are a few critical steps people mess up. This guide walks you through the entire process, from picking the right spot to that final, satisfying flush.
- Choosing the perfect location for your softener unit
- A step-by-step breakdown of the plumbing connections
- How to program and start up your system correctly
- Common mistakes that lead to leaks or poor performance
What Is a Water Softener System?
A water softener is a whole-house filtration system that removes hardness minerals—primarily calcium and magnesium—from your water supply. It uses a process called ion exchange, swapping those hard minerals for sodium ions on a resin bed inside the tank. The result? Water that feels slick, doesn’t leave scale on your fixtures, and makes your soap actually lather.
You install it at your home’s main water entry point, right after the meter. Every faucet, shower, and appliance then gets treated water. This is different from a point-of-use filter, like a chlorine water filter for your kitchen sink. A softener tackles the whole house’s problem at the source.
In our experience, the biggest confusion is between softening and filtering. A softener doesn’t remove contaminants like lead, bacteria, or chlorine. For that, you need additional filtration stages, often a carbon filtration system working in tandem.
How a Water Softener Installation Works
This isn’t just about connecting pipes. A proper install ensures efficiency, longevity, and prevents catastrophic leaks. Let’s break it down.
1. Planning and Location Selection
Find a spot near your main water shut-off, before the water heater. You need a power outlet (for the control head), a drain (for backwash), and enough space to service the unit. Keep it out of freezing areas. We’ve seen installations in uninsulated garages fail in the first winter.
2. The Plumbing Surgery
This is the core of the job. You’ll cut your main water line and install a bypass valve assembly. This valve lets you isolate the softener for maintenance without cutting water to the whole house. Use a tubing cutter for clean cuts. Solder your fittings before connecting them to the plastic bypass valve to avoid melting it.
3. Drain and Overflow Connections
The softener needs to flush brine and hardness minerals down a drain. Connect the drain line to a floor drain, utility sink, or standpipe. Follow the manufacturer’s height specifications—usually a minimum distance above a drain to prevent back-siphoning. This is a non-negotiable step for code compliance.
4. Initial Startup and Programming
Once connected, slowly open the bypass valve to pressurize the system. Check every connection for leaks. Then, add water to the brine tank and pour in the recommended salt. Run the system through a manual regeneration cycle. This flushes the resin bed and prepares it for service. Set the hardness level on the control valve based on your water test results.
Key Benefits of a Proper Install
Protect Your Appliances: Scale buildup from hard water is a water heater’s worst enemy. It insulates the heating element, forcing it to work harder and shortening its lifespan. A softener pays for itself in appliance longevity.
Real Cleaning Power: You’ll use up to 50% less soap, shampoo, and detergent. Soft water allows soap to lather effectively instead of forming scum. Your dishes will sparkle, and your laundry will feel softer.
Scale-Free Fixtures: Say goodbye to scrubbing crusty white deposits off your shower doors, faucets, and kettle. It’s a small thing that makes daily life noticeably better.
Potential Drawbacks & Challenges
Salt Management: You have to keep the brine tank filled with salt. It’s a monthly chore. Forget, and your water goes hard again.
Space and Drain Requirements: Not everyone has a convenient drain near their main water line. Running a drain line can be a major part of the install complexity.
Not a Contaminant Filter: If your water has iron, manganese, or sediment, you’ll need a pre-filter. A softener alone can get fouled by iron. Check out our guide on the best iron water filter options to pair with your softener.
Types of Installations
Traditional Metered Softener
The most common type. It measures water usage and regenerates only when needed, saving salt and water. This is what most homeowners install. The plumbing is straightforward: main line in, soft line out.
Dual-Tank or Cabinet-Style Softeners
For homes with very high water use or limited space. One tank regenerates while the other provides soft water continuously. Installation is similar but requires connecting two tanks to the control valve.
Portable or RV-Style Softeners
Units like the VEVOR RV Water Softener are designed for temporary use. They connect via hose fittings, making them a plug-and-play option for renters, RVs, or car washing. No permanent plumbing required.
Buying Guide: What You Actually Need
Get Your Water Tested First. Don’t guess your hardness level. Buy a test kit or get a report from your municipality. The softener’s size (in grain capacity) depends entirely on this number and your household size.
Bypass Valve is Mandatory. If the kit doesn’t include one, buy it separately. Brass is more durable than plastic.
Match the Drain Type. Check if you need a floor drain, standpipe, or laundry tub connection. Plan your drain line route before you buy.
Consider a Pre-Filter. A simple sediment filter upstream protects the softener’s resin from grit and extends its life. It’s a cheap insurance policy.
And remember, a softener handles hardness. For comprehensive purification, you might pair it with a dedicated under-sink system for drinking water, like an 800 GPD reverse osmosis unit for removing TDS, lead, and other dissolved solids.
Our Top Picks for DIY Installs
| Product | Key Feature | Best For | Links |
|---|---|---|---|
 |
16,000 grain, portable with hose fittings | Renters, RVs, car washing, small homes |
Buy on Amazon Buy on eBay |
 |
9-stage, 800 GPD, NSF certified | Under-sink drinking water purification (complementary to softener) |
Buy on Amazon Buy on eBay |
VEVOR RV Water Softener, 16,000 Grain
This is a clever little unit. We tested it on a friend’s RV and for washing cars. It genuinely softens water, and the setup is dead simple—just connect the hoses. But let’s be clear: this is not a whole-house solution. It’s a point-of-use softener for specific tasks. The 16,000 grain capacity is small; it’ll exhaust quickly with heavy use. Perfect for its intended purpose, though.
- Incredibly easy setup, no plumbing
- Portable and lightweight
- Effective for small-volume applications
- Not for whole-house use
- Small capacity requires frequent regeneration
- Manufacturer warranty may not apply
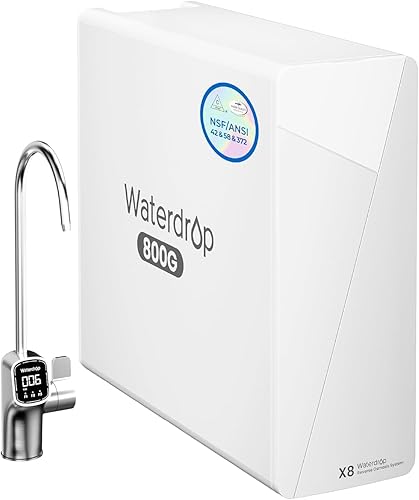
Waterdrop WD-X8 Reverse Osmosis System
While not a softener, this is what we recommend pairing with one for your drinking water. The 9-stage filtration, including a 0.0001μm RO membrane, removes what a softener doesn’t: chlorine, lead, PFAS, fluoride, and TDS. The 800 GPD flow rate is impressive—no waiting for a slow trickle. The 2:1 pure-to-waste ratio is among the best we’ve seen, saving water compared to older RO systems.
- NSF/ANSI 42 & 58 certified for contaminant reduction
- High flow rate, fills glasses quickly
- Excellent water efficiency (2:1 ratio)
- Requires under-sink installation and a dedicated faucet
- Does not address water hardness (that’s the softener’s job)
Frequently Asked Questions
- Can I install a water softener myself?
- Yes, if you’re comfortable with basic plumbing—cutting pipes, soldering or using compression fittings, and connecting drain lines. Most homeowners with DIY experience can do it in an afternoon. Always pull a permit if your local code requires it.
- Where should a water softener be installed?
- Install it on your main water line, after the meter and before the water heater. It needs to be indoors or in a climate-controlled space to prevent freezing, and near a power outlet and a drain for the backwash cycle.
- Does a water softener need a drain?
- Yes, absolutely. The system flushes brine and hardness minerals during its regeneration cycle. This wastewater must go to a floor drain, utility sink, or standpipe. Never route it into your septic system without checking compatibility first.
- How long does it take to install a water softener?
- For a straightforward installation with easy access to plumbing, budget 4 to 6 hours. If you need to run a long drain line or deal with tight spaces, it could take a full day. Don’t rush the soldering.
- Do I need a permit to install a water softener?
- It depends on your municipality. Many require a plumbing permit for any alteration to your home’s water supply. A quick call to your local building department can save you a fine. The inspection also ensures it’s done safely.
- What size water softener do I need for my house?
- Size depends on your water’s hardness (in grains per gallon) and your daily water usage. Multiply your household size by 75 gallons (average use per person), then multiply by your hardness number. Choose a softener with a grain capacity that handles that daily load and regenerates about once a week.
Final Thoughts
Installing a water softener is one of the best upgrades you can make for your home’s comfort and plumbing health. The process is methodical, not magical. Plan your location, respect the drain requirements, and don’t skip the bypass valve. If your water has other issues like iron or sediment, address those first with a proper pre-filter.
For most homes, a quality metered softener paired with a point-of-use drinking water system gives you the best of all worlds: scale-free showers and pure, great-tasting water from the tap. Take your time with the install, double-check your connections, and you’ll enjoy the benefits for a decade or more.