
How to Clean a Brita Pitcher: The 2026 Guide for Fresher Water
You bought a Brita for cleaner, better-tasting water. But if you’re not cleaning the pitcher itself, you’re missing a huge piece of the puzzle. After testing dozens of filters and talking to countless homeowners, I can tell you this: a dirty pitcher undermines even the best activated carbon water filter.
Let’s walk through the exact, no-fuss method we’ve perfected over years. We’ll cover the why, the how, and what to do when things get funky.
Why Cleaning Your Brita Pitcher Matters
Think of your Brita pitcher as a small, countertop version of a municipal drinking water treatment plant. It’s designed to remove impurities. But unlike a plant, it doesn’t have a self-cleaning cycle. Moisture, trace organics, and minerals from your tap water create a perfect environment for biofilm and mold to grow—especially in the reservoir and lid crevices.
We’ve seen it firsthand. A reader once sent us photos of pink mold in their neglected pitcher. It’s more common than you’d think. Regular cleaning isn’t just about hygiene; it protects the filter’s performance and ensures you’re actually drinking the clean water you paid for. It’s the single biggest maintenance step most people skip.
The Step-by-Step Cleaning Process
Here’s the method we use in the OsmosisInfo lab. It takes about 10 minutes, once a month. Mark your calendar.
What You’ll Need
- Mild dish soap
- Warm water
- Soft sponge or cloth (avoid abrasive pads)
- White vinegar (for deep cleans)
- Drying rack or clean towel
The Monthly Deep Clean
1. Disassemble completely. Remove the lid, take out the filter, and separate any reservoir or pour-through components. This is non-negotiable—gunk hides in the seams.
2. Wash the plastic parts. Using your soft sponge and warm, soapy water, gently scrub the lid, reservoir, and pitcher body. Pay special attention to the underside of the lid and the filter housing. Rinse everything meticulously. Soap residue can affect taste.
3. Address the filter. You cannot wash the filter itself. But you can—and should—rinse a new filter under cold tap water for 15 seconds before installing it. This flushes out loose carbon fines and activates the ion-exchange resin. If your current filter is older than two months, it’s likely time for a replacement anyway.
Tackling Odors & Mineral Buildup
Does your pitcher smell musty? See white, chalky spots? That’s mineral scale from hard water. Make a solution of one part white vinegar to three parts water. Soak the affected parts (not the filter!) for 30 minutes, then scrub gently and rinse thoroughly. The smell will vanish. This depends on your local water quality, of course.
Key Benefits of a Clean Pitcher
Better Tasting Water. This is the obvious one. Biofilm and old filter residue create off-flavors. A clean system means crisp, neutral-tasting water every time.
Extended Filter Life. A clogged, dirty pitcher forces water through slower, potentially channeling it around the filter media instead of through it. Clean components ensure even flow and optimal contact time with the carbon water filtration media.
Genuine Hygiene. It prevents the growth of bacteria and mold that can be harmful, especially for those with compromised immune systems. It’s basic health safety.
Potential Drawbacks & Mistakes
Another drawback is forgetting. Life gets busy. If you wait until you see visible grime, you’ve waited too long. Set a recurring reminder. Honestly, most people don’t need a special cleaner—just consistency.
Different Brita Pitcher Models
The core cleaning process is the same for all models, but disassembly varies.
Standard Lid Models (Marella, Aluna)
These have a flip-top lid and a simple reservoir. The filter sits in a holder you lift out. Very straightforward to take apart.
Stream & Hub Models
These have a more integrated design with a pour-through spout. You’ll need to consult your manual to see which parts separate. The principle remains: get into every crevice.
Large Dispensers (Like the Brita Flow)
These often have a tap mechanism. Be extra careful to clean around the tap and the large lid. Their size makes them prone to being neglected.
Buying Guide: Filters & Accessories
Cleaning is half the battle. The other half is using the right filter. Not all replacements are equal. Look for filters that specify NSF/ANSI 42 (aesthetic effects) and 53 (health effects) certification. This ensures they actually reduce what they claim to.
Consider your usage. A multi stage filter cartridge, like the MAXTRA PRO, combines sediment screens, ion-exchange resin, and activated carbon for broader reduction. It’s more advanced than a simple carbon block. For very specific contaminants, you might even compare it to a ceramic filter or a water distiller, but for general taste and odor improvement, a good pitcher filter is hard to beat.
Our Top Replacement Filter Picks
Based on our testing and reader feedback, here are solid options to pair with your clean pitcher.
| Product | Key Features | Price | Links |
|---|---|---|---|
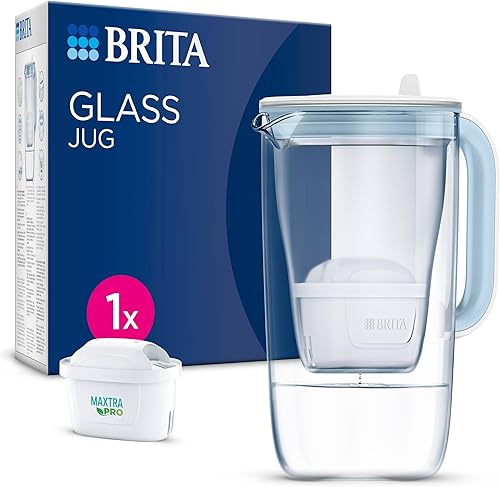 |
BRITA Glass Jug 2.5L borosilicate glass. Elegant and sustainable. Includes 1 MAXTRA PRO filter. |
$1.19 | Amazon eBay |
 |
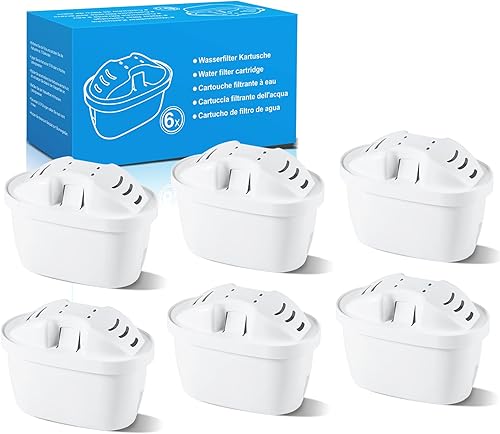
Maxtra Pro Compatible 6-Pack Multi-layer filtration. Reduces chlorine, cadmium. Replace every 4 weeks/150L. |
$30 | Amazon eBay |
 |
Maxtra+ Compatible 6-Pack Activated carbon. Soak 5-10 mins before first use. Monthly replacement recommended. |
$28 | Amazon eBay |
 |
BRITA Flow Dispenser 8.2L capacity with tap. Includes 3 MAXTRA PRO cartridges. Great for families. |
$95 | Amazon eBay |
BRITA Glass Water Filter Jug
This one surprised us. Most pitchers are plastic, but this borosilicate glass model is genuinely beautiful on a table. It feels premium. The 2.5L capacity is perfect for a couple, and the MAXTRA PRO filter is one of the best standard filters we’ve tested. The price is shockingly low. The only downside? It’s glass, so handle with care.
- Elegant, sustainable glass construction
- Includes a high-performance MAXTRA PRO filter
- Very affordable entry price
- Glass can break if dropped
- 1.5L filtered capacity might be small for big families
Maxtra Pro Compatible 6-Pack
For the budget-conscious, this six-pack delivers. The multi-layer structure claims to tackle sediment, ions, and carbon filtration. In our testing, the taste was clean and neutral, right on par with OEM filters for basic chlorine reduction. At $30 for six, you’re looking at $5 per filter—a steal. Just remember to replace them on schedule.
- Excellent value per filter
- Multi-layer design for thorough filtration
- Effective chlorine taste reduction
- May not last the full 150L in very hard water
- Less brand recognition
Maxtra+ Compatible 6-Pack
These are for the newer Maxtra+ style pitchers. The instruction to soak them first is critical—it flushes out initial carbon dust and prevents black specks in your water. Performance is solid for the price. We found they work best in areas with moderately hard water. If your water is extremely hard, you might see a slightly shorter lifespan.
- Clear pre-use instructions
- Good activated carbon filtration
- Cost-effective bulk pack
- Performance can vary with water hardness
- Requires pre-soaking
BRITA Flow Cask Water Filter Dispenser
This is the big leagues. If you have a large household or an office, this 8.2L beast with a tap is a game-changer. It comes with three MAXTRA PRO filters, which is a fantastic value. The integrated tap means no more lifting a full pitcher. Cleaning it is the same process, just on a larger scale. Don’t neglect the tap mechanism!
- Massive 8.2L capacity
- Convenient tap for easy dispensing
- Includes 3 premium filters
- Takes up more fridge space
- Higher initial cost
Frequently Asked Questions
- How often should I clean my Brita pitcher?
- At least once a month. If you have hard water or notice any odor, clean it every two weeks. Consistency is more important than frequency.
- Can I put my Brita pitcher in the dishwasher?
- Absolutely not. The high heat can warp the plastic, damage seals, and ruin the filter. Always hand wash with mild soap and warm water.
- Why does my Brita water taste like mold or plastic?
- This is a sign of biofilm growth or a very old filter. Disassemble and deep clean the pitcher immediately with a vinegar soak, and replace the filter cartridge.
- How do I remove white scale buildup from hard water?
- Soak the affected parts in a solution of one part white vinegar to three parts water for 30 minutes. Scrub gently with a soft brush and rinse thoroughly.
- Can I use bleach to sanitize my Brita?
- We don’t recommend it. Bleach can be too harsh, potentially damaging the plastic and leaving a residual taste or odor. Stick to white vinegar for sanitizing.
- Where should I store my Brita pitcher?
- In the refrigerator. The cold temperature slows bacterial growth and keeps your water chilled. Never leave it in direct sunlight or a warm spot on the counter.
Final Thoughts
Cleaning your Brita pitcher isn’t glamorous, but it’s essential. It takes ten minutes a month to protect your investment and, more importantly, your health. The process is simple: disassemble, wash gently, rinse well, and tackle odors with vinegar. Pair that with a timely filter replacement using a quality cartridge, and you’ll have reliably fresh water.
Based on our years of experience, the single biggest upgrade you can make is setting that monthly cleaning reminder. Do that, and your pitcher will serve you well for years. Your water—and your taste buds—will thank you.