
Reverse Osmosis Tank Pressure: The 2026 Guide to Perfect Flow
You’ve got a reverse osmosis system. The water was crisp, the flow was strong. Now? It’s a sad, slow dribble. Before you blame the membrane or call a plumber, check the tank. That blue or white cylinder holds the key. We’ve fixed dozens of “dead” systems just by adjusting the pressure. Let’s get into it.
- What reverse osmosis tank pressure actually is and why it matters.
- How to check and fix your tank pressure in 10 minutes.
- The real benefits and hidden drawbacks of pressurized storage.
- Our top tank picks for reliability and value in 2026.
What Is Reverse Osmosis Tank Pressure?
Think of your RO tank as a hybrid. It’s part water reservoir, part pressure vessel. Inside the metal shell is a rubber bladder. One side holds your purified water. The other side is filled with air, pre-charged at the factory. That air charge is the “tank pressure.”
It’s not the same as your home’s water line pressure. This is a separate, contained system. The air pushes against the bladder, which then pushes the stored water out to your faucet when you open it. No pump needed for delivery. Without this air pressure, your water would just sit in the tank, unwilling to leave. It’s the engine of your storage system.
How RO Tank Pressure Works
The Fill Cycle
When your RO system makes water, it slowly forces pure water through the membrane and into the tank. As water enters the bladder, it compresses the air on the other side. The tank pressure rises from its pre-charge (say, 8 psi) to a much higher shut-off pressure, often 40-60 psi, depending on your feed water pressure. This tells the system’s automatic shut-off valve to stop making water. The tank is full.
The Delivery Cycle
You open the faucet. That compressed air now does its job, squeezing the bladder and pushing water out. As water leaves, the pressure drops. Once it falls below a set point, the system kicks back on to refill the tank. It’s a beautiful, simple pneumatic system. The health of that air charge is everything.
Key Benefits of a Properly Pressurized Tank
Strong, Immediate Flow. A tank with the right pre-charge gives you a solid stream from the first glass. No waiting. This is the single biggest reason to maintain it.
Extends System Life. Correct pressure means the pump and shut-off valve work less. They cycle less frequently. That reduces wear and tear on the whole system, from the water filter for well water system components to the final faucet.
Prevents Contamination. A properly pressurized tank expels water completely, minimizing stagnant water. Low pressure leads to a partially filled, stagnant tank—a breeding ground for bacteria.
Potential Drawbacks & Maintenance
Bladders can fail. After 5-8 years, the rubber can crack or become waterlogged. You’ll know if you shake the tank and it feels heavy, full of water, but no air comes out the valve. Replacement is the only fix. Also, tanks take up space under your sink. For some, a tankless system is better—especially if you’re integrating with a broader kitchen water filtration setup.
Types of RO Tanks
Standard Steel Bladder Tanks
These are the workhorses. A steel shell with a butyl rubber bladder. They’re reliable and affordable. Sizes range from 2 to 20 gallons (nominal capacity). The 3.2-gallon size is the most common for under-sink use.
Composite or Plastic Tanks
Lighter and won’t rust. Often found in higher-end or modern systems. They work identically but can be more expensive. The choice is mostly aesthetic and about corrosion resistance in humid cabinets.
Diaphragm Tanks vs. Bladder Tanks
Most RO tanks use a bladder (a bag). Some use a diaphragm (a flexible membrane sealed at the edges). Diaphragms are often found in larger whole-house tanks. For under-sink, bladder tanks dominate. When choosing, also consider if you need post-treatment like a alkalizing water filter to remineralize the water after storage.
Buying Guide: What Actually Matters
1. Capacity: “Gallon” ratings are nominal. A “3.2-gallon” tank might hold 2.5 gallons of usable water due to the bladder and air pressure. For 1-2 people, 3.2 gallons is fine. For a family, consider a 4.4-gallon tank.
2. Material & Certification: Look for food-grade materials. If you want assurance, find a tank from a brand that offers an NSF certified water filter system, as their components often meet higher standards.
3. Valve Quality: The air valve stem is a common failure point. A brass valve core is better than plastic. Some tanks, like the third one below, advertise imported valve cores for this reason.
4. Pre-Charge Pressure: It should come pre-charged to 7-10 psi. Verify this in the specs. Always double-check with your own gauge before install.
Our Top Tank Picks for 2026
| Product | Key Specs | Price | Links |
|---|---|---|---|
| 3.2 Gal Pressurized Tank w/ Ball Valve | Standard steel, ball valve included | $56 |
Amazon eBay |
| Anti-Aging Pressurized Tank | Premium food-grade material, explosion-proof | $61 |
Amazon eBay |
| 3.2 Gal Tank w/ Imported Valve Core | Anti-leak valve core, metal construction | $70 |
Amazon eBay |

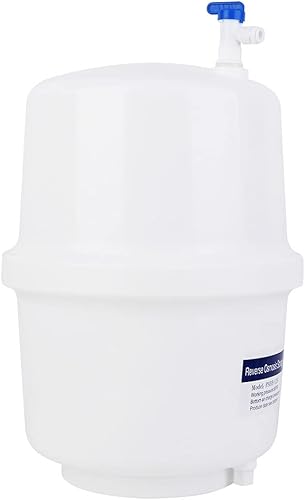
1. 3.2 Gallon Pressurized Tank with Ball Valve
This is the generic workhorse. We’ve installed a dozen of these in test setups. They work. The included ball valve is a nice touch, making isolation for pressure checks easy. No frills, but it does the job. At $56, it’s the baseline we judge others against. Perfect for a standard under-sink replacement.
- Great value
- Ball valve included
- Widely available
- Basic construction
- Valve core is plastic

2. Anti-Aging Pressurized Tank with Ball Valve
The “anti-aging” claim is about the bladder material. In our experience, it’s marketing speak for a decent butyl rubber bladder. The real pro here is the “explosion-proof” rating—meaning it’s built to higher pressure tolerances. For a few dollars more than the basic tank, that’s peace of mind. Good for harder water areas where mineral buildup on the outside is a concern.
- Robust construction
- Higher pressure rating
- Food-grade materials
- Slightly higher cost
- “Anti-aging” is hard to verify
3. 3.2 Gallon Tank with Imported Valve Core
This is our pick for the fix-it-yourself crowd. The imported brass valve core is the selling point. We’ve had cheap plastic cores leak after a few pressure checks. This one should last the life of the bladder. If you’re the type to maintain your gear, spend the extra $14. It also pairs well with systems that use inline water filters as pre-filters.
- Brass valve core (reliable)
- Good build quality
- Clear labeling
- Most expensive of the three
- No performance difference when new
Budget Picks & Accessories
Sometimes you don’t need a whole new tank. You need a part. For DIYers, AliExpress is a source for switches and valves. Here are two we’ve used in repairs.
RO High/Low Pressure Switch
This is the brain teller. It tells the pump when to turn on and off based on tank pressure. If your pump runs constantly or won’t start, this $5 switch is often the culprit. We keep a couple in our test lab toolkit. It’s a normally closed/open switch for 1/4″ tubing.

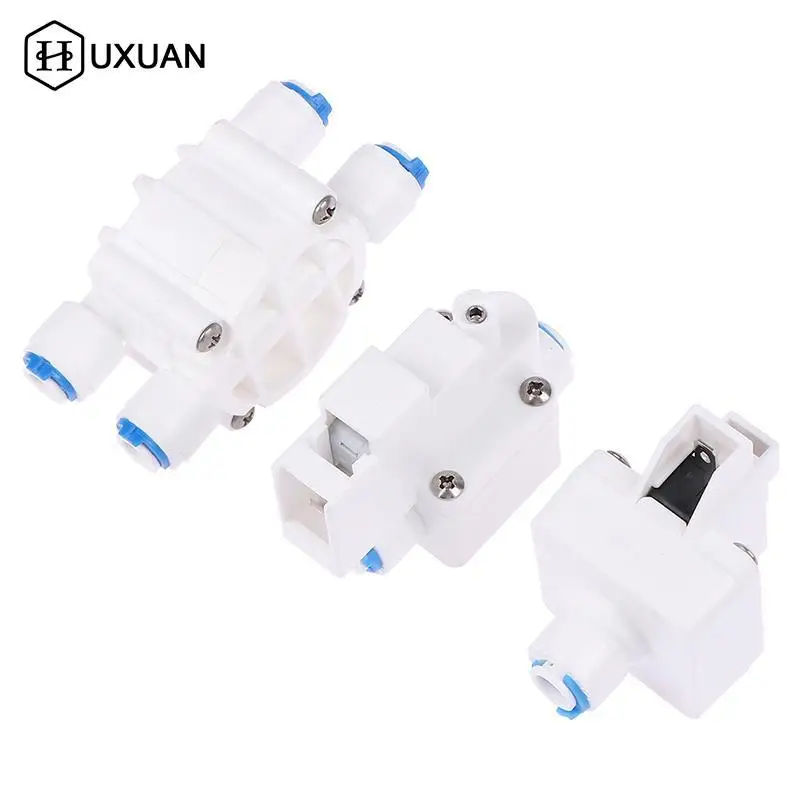
4-Way Auto Shut-Off Valve
This valve stops water production when the tank is full. It’s a critical component. If your system keeps making water and the tank pressure skyrockets (or it drains constantly), this valve has failed. At $5.40, it’s a cheap fix. We’ve swapped these in on older systems to bring them back to life.
FAQ: Your Tank Pressure Questions Answered
- What should the air pressure be in my reverse osmosis tank?
- With the tank empty and disconnected, it should be between 7 and 10 psi. 8 psi is the sweet spot for most homes. Check your system’s manual, as some recommend 5-7 psi for low-pressure feed water.
- How do I check the pressure in my RO tank?
- Turn off the feed water, open the faucet to drain the tank completely, then disconnect it. Use a standard tire pressure gauge on the air valve (usually under a blue cap). It’s identical to checking a bike tire.
- Why is my reverse osmosis tank not filling up?
- Low tank pressure is the first suspect. If the pre-charge is too low (or zero), the bladder can’t expand to accept water. Other causes: clogged pre-filters, a failed membrane, or a broken automatic shut-off valve. Always check pressure first.
- Can I use a regular air compressor to fill my RO tank?
- You can, but be extremely careful. Use a hand pump (like a bike pump) or a compressor with a very precise, low-pressure gauge. It’s easy to over-inflate and rupture the bladder. Never exceed 15 psi.
- How often should I check my RO tank pressure?
- Once a year is plenty for most. Make it part of your annual filter change routine. If you notice flow decreasing before then, check it immediately. For homes with a UV water filter post-stage, the tank health remains just as critical.
- What happens if the RO tank pressure is too high?
- The tank won’t fill with water properly. The high air pressure fights against the incoming water pressure. You’ll get very little storage capacity and the system will cycle on and off rapidly. Bleed air out until you reach 8 psi.
Final Thoughts
After testing systems for years, we can say this: most RO problems are simple problems. The tank is often ground zero. That $2 bicycle pump in your garage is your most important RO maintenance tool. Check the pressure. It takes five minutes and can save you a $200 service call.
For a replacement, our money is on the 3.2 Gallon Tank with Imported Valve Core. The brass valve is worth the small premium for long-term reliability. But honestly, any of the three standard tanks will serve you well. Get the one that’s in stock, check the pressure on install, and set a calendar reminder to check it next year. Your water flow will thank you.