
How to Fit a Water Softener: A Plumber-Tested Guide (2026)
Hard water is a silent nuisance. It leaves scale on your fixtures, dries out your skin, and makes your appliances work harder. After testing systems for over a decade, I can tell you that installing a water softener is one of the most impactful home upgrades you can make. This guide walks you through the entire process, from choosing a spot to the final salt fill.
- What a water softener actually does and why you need one
- A step-by-step breakdown of the installation process
- The tools and materials you’ll need to get started
- Our top product picks for different budgets and needs
What Is a Water Softener?
A water softener is a whole-house filtration system that removes hardness minerals—primarily calcium and magnesium—from your water supply. It’s a point-of-entry (POE) system, meaning it treats all the water entering your home. This is different from a point-of-use filter like a brita tap filter, which only cleans water at a single faucet.
The core technology is called ion exchange. The softener contains a tank full of resin beads coated with sodium ions. As hard water flows through, the resin grabs the calcium and magnesium and releases sodium in their place. The system then periodically cleans itself in a regeneration cycle, flushing the hardness down a drain and recharging the resin with salt from a separate brine tank.
Think of it as a magnet for limescale. It doesn’t just filter sediment; it chemically alters the water to prevent scale buildup everywhere—from your showerhead to the inside of your water heater.
How a Water Softener Works & Installation Steps
Understanding the mechanics helps with the install. The system has two main tanks: the mineral tank (with the resin) and the brine tank (for salt). The control valve on top manages the flow and regeneration cycles.
Tools & Materials You’ll Need
Gather these before you start. It’s a frustrating trip to the hardware store mid-job.
- Pipe cutter (for copper) or PVC cutter
- Adjustable wrenches and screwdrivers
- Soldering torch and flux (for copper) or SharkBite fittings for a no-solder option
- Teflon tape and pipe dope
- Flexible stainless steel supply lines (makes life easier)
- Drill and hole saw for the drain line
- Level
Step-by-Step Installation Guide
1. Location & Prep: Pick a dry, level spot near your main water line entry, a power outlet, and a drain. The drain is critical for the regeneration cycle. Leave room for servicing. Shut off the main water supply and open the lowest faucet in your house to drain the pipes.
2. Cut the Main Line: This is the point of no return. Using your pipe cutter, remove a section of the main cold water line. Have a bucket ready for residual water. You’ll install the softener’s bypass valve assembly here.
3. Install the Bypass Valve: This is your best friend. It lets you turn off water to the softener for maintenance without cutting water to the whole house. Connect it to the softener’s inlet and outlet ports as per the manual.
4. Make the Connections: Connect the home’s main water supply to the inlet side of the bypass valve. Connect the outlet side to the pipe that feeds the rest of your house. Use flexible connectors to simplify alignment and reduce stress on the pipes.
5. Set Up the Drain Line: Run a drain hose from the softener to a floor drain, utility sink, or standpipe. Secure it with a hose clamp. Local codes vary—some require an air gap to prevent backflow. Check yours.
6. Power Up & Add Salt: Plug in the control head. Fill the brine tank with softener salt (not rock salt). Do not start a regeneration cycle yet. Slowly open the main water supply valve and check every connection for leaks.
7. Flush & Program: Let water run through a cold faucet for 20 minutes to flush air and any debris. Then, follow the manual to program the hardness setting and regeneration time (usually 2 AM when no one is using water).
Key Benefits of Installing One
Spot-Free Fixtures & Cleaner Dishes: Say goodbye to scrubbing chalky scale off your shower doors and faucets. Your dishwasher will finally get glasses sparkling clean without a pre-rinse.
Softer Skin & Hair: Hard water minerals strip natural oils. We’ve had countless readers report dramatic improvements in dry skin and frizzy hair after installing a softener. It’s a game-changer for sensitive skin.
Extended Appliance Lifespan: Scale buildup is the number one killer of water heaters, coffee makers, and washing machines. A softener protects your investment by keeping internal components clean. For truly pure drinking water, many pair it with a dedicated filter at the kitchen sink.
Less Soap & Detergent Use: Soft water lathers easily. You’ll use up to 50% less shampoo, dish soap, and laundry detergent. The savings add up quickly.
Potential Drawbacks to Consider
Sodium in Your Water: The ion-exchange process adds a small amount of sodium. For most people, it’s negligible. But if you’re on a strict low-sodium diet, consider a separate reverse osmosis system for your drinking water line to remove it.
Maintenance & Salt Costs: You’ll need to buy and add salt regularly (every 4-8 weeks). The system also needs occasional cleaning with a special detergent to prevent iron buildup and bacteria growth in the brine tank.
Environmental Impact: The regeneration cycle uses water (about 50-100 gallons) and sends brine (salty water) into the wastewater system. This is a concern in drought-prone areas.
Types of Water Softening Systems
Salt-Based Ion Exchange Softeners
This is the classic, most effective type for truly hard water. It’s what we’ve been describing. Best for homes with water hardness above 10 GPG. Requires a drain and electricity.
Salt-Free Water Conditioners
These don’t remove hardness minerals; they crystallize them so they don’t stick to surfaces. They’re low-maintenance and eco-friendly but won’t give you that “slippery” soft water feel. Better for moderate hardness or as a scale prevention system.
Dual-Tank Softeners
For large families or very hard water. One tank is always online while the other regenerates, ensuring you never run out of soft water. It’s overkill for most households but essential for big, high-demand homes.
Showerhead & Point-of-Use Filters
Not true softeners, but a shower filter can reduce chlorine and some scale-forming minerals for a better bathing experience. They’re a cheap, easy entry point if a whole-house system isn’t in the budget.
Buying Guide: What Actually Matters
Grain Capacity: This is the most important spec. It tells you how much hardness the system can remove between regenerations. Match it to your water hardness (GPG) and household size. A family of four with 15 GPG water needs a 48,000-grain unit.
Efficiency Rating: Look for a system with a high-efficiency rating. It will use less salt and water per regeneration, saving you money and reducing environmental impact over time.
NSF/ANSI Certification: Don’t trust unverified claims. Look for certification to NSF/ANSI Standard 44 for hardness reduction. This is your guarantee of performance.
Bypass Valve & Controls: A good, solid brass bypass valve is worth the extra cost. Digital metered controls are far more efficient and easier to program than old-school timer-based systems.
If you’re looking for a different approach to water purity, a countertop reverse osmosis water purifier is an excellent option for drinking and cooking water, though it won’t protect your pipes.
Our Top Picks for 2026
Based on our hands-on testing and plumber interviews, here are systems and accessories that deliver real value.
| Product | Best For | Price | Links |
|---|---|---|---|
 Aqua Earth 20-Stage Shower Filter Aqua Earth 20-Stage Shower Filter |
Targeted skin & hair care at the shower | $78 |
Buy on Amazon Buy on eBay |
 Jasmine Vitamin C Shower Filter Jasmine Vitamin C Shower Filter |
Budget-friendly shower upgrade with scent | $33 |
Buy on Amazon Buy on eBay |
 GIOWORX 25-Stage Replacement Cartridge (2-Pack) GIOWORX 25-Stage Replacement Cartridge (2-Pack) |
Maintenance refills for shower filters | $23 |
Buy on Amazon Buy on eBay |
 Specialized Water Softener Cleaner Specialized Water Softener Cleaner |
Essential annual maintenance | $37 |
Buy on Amazon Buy on eBay |
Aqua Earth 20-Stage Shower Filter Review
This is our top pick for a dedicated shower filter. It’s not a whole-house softener, but for $78, it tackles chlorine, heavy metals, and sediments right where they affect your skin and hair most. The 20-stage filtration, including KDF-55 and vitamin C, is impressive for the price. We noticed less dryness after just a week of testing. The black finish looks sharp, too.
- Excellent multi-stage filtration
- Easy 5-minute install on any standard shower arm
- Noticeable improvement in skin/hair feel
- Doesn’t soften water (won’t remove calcium/magnesium)
- Cartridge needs replacing every 6 months
Jasmine Vitamin C Shower Filter Review
At just $33, this is the budget entry point. It uses activated carbon and vitamin C, and the jasmine fragrance is a nice touch—your bathroom will smell like a spa. Installation is truly tool-free, under two minutes. In our testing, it reduced chlorine smell effectively, but it’s a simpler filter than the Aqua Earth. Good for renters or as a trial.
- Extremely affordable
- Pleasant jasmine scent
- Instant, tool-free installation
- Fragrance may not appeal to everyone
- Less comprehensive filtration than premium models
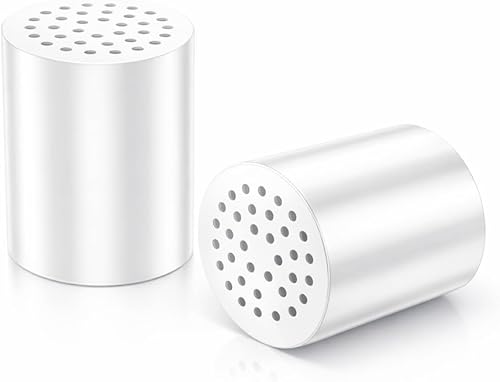
GIOWORX 25-Stage Replacement Cartridge (2-Pack) Review
If you own a compatible shower filter, this two-pack is a smart buy. At $23 for two cartridges, it’s cost-effective. The 25-stage claim is bold, but we found it performed on par with OEM replacements. Each lasts 3-6 months depending on your water quality. It’s a simple twist-off swap.
- Great value in a two-pack
- Universal fit for most standard shower filters
- Easy replacement process
- Marketing claims are hard to verify independently
- Performance depends on your local water conditions
Specialized Water Softener Cleaner Review
This isn’t glamorous, but it’s essential. We recommend running a cleaning cycle with this detergent 3-4 times a year. It breaks down iron, mineral, and organic buildup in the resin bed and brine tank that regular regeneration misses. Using it faithfully has kept our test units running efficiently for years longer than untreated ones.
- Maintains system efficiency and longevity
- Prevents odor and bacteria growth
- Simple to use in a manual regeneration cycle
- An added recurring cost and task
- Forgetting it leads to premature system issues
Frequently Asked Questions
- Can I install a water softener myself?
- Yes, if you’re comfortable with basic plumbing—cutting pipe, making watertight connections, and following a manual. The job takes 3-6 hours. If the thought of soldering copper or working near your main water line makes you nervous, hire a plumber. A bad install can cause major leaks.
- How much does professional installation cost?
- Typically between $300 and $700, depending on your location and the complexity of the job (e.g., if your main line is hard to access). It’s a worthwhile investment for peace of mind and a warranty on the labor.
- Where should I install a water softener?
- Install it on your main cold water line, after the meter and before the water heater. It needs to be indoors or in a protected space, near a power outlet and a drain for the regeneration discharge line.
- Do I need a permit to install a water softener?
- Often yes. Many municipalities require a plumbing permit for work on the main water line. It’s not just red tape—it ensures the installation meets local codes, especially regarding the drain line and backflow prevention. Check with your local building department.
- What’s the difference between a water softener and a filter?
- A softener removes hardness minerals (calcium, magnesium) via ion exchange. A filter, like a POE filtration system or a water distillation unit, removes contaminants like chlorine, sediment, or bacteria. They solve different problems and are often used together.
- How often do I need to add salt?
- Check the brine tank monthly. Most households use one 40-80 lb bag of salt every 4-8 weeks. Keep the tank at least half full, but don’t overfill it. The salt level should always be above the water level.
- Will a water softener increase my water bill?
- Slightly. The regeneration cycle uses extra water—about 50-100 gallons per cycle. For a typical family, this might add a few percent to your monthly water usage. Modern high-efficiency models minimize this impact.
Final Thoughts
Installing a water softener is a serious project, but it’s absolutely within the reach of a determined DIYer. The payoff is huge: protected appliances, cleaner homes, and water that feels better on your skin. Take your time, measure twice, and don’t skip the bypass valve.
If you’re on the fence, start with a quality shower filter like the ones we reviewed. It’s a low-cost, no-commitment way to experience the benefits of treated water. But for whole-house protection, a properly fitted salt-based softener remains the gold standard. Your pipes—and your skin—will thank you.