
Ever wonder what’s really in your tap water? Or how to make a stream safe to drink on a backpacking trip? I’ve spent years testing filters, touring treatment plants, and grumbing plumbers about pipe gunk. This guide cuts through the noise. We’ll cover what water treatment actually is, how the main methods work, and how to pick the right one for your home or next adventure.
What Is Water Treatment?
At its core, water treatment is about removing or killing harmful stuff so water is safe for a specific use. That could be drinking, cooking, washing, or even industrial processes. The goal isn’t always pure H2O—it’s water that meets safety standards for its intended purpose.
We get a lot of confused emails. People think “treatment” only means massive municipal plants. Not true. It’s a broad field. It includes the chlorine tablet you drop in a canteen, the under-sink filter in your kitchen, and the UV light sterilizing a well. The scale changes, but the principle is the same: identify contaminants, then use a method to remove or neutralize them.
Contaminants vary wildly. They can be biological (bacteria, viruses, parasites), chemical (lead, pesticides, chlorine), or physical (sediment, rust). Your city’s treatment plant deals with one mix. Your well deals with another. A river in the backcountry has its own unique cocktail. The first step in any treatment plan is knowing what you’re up against.
How Water Treatment Works
Think of treatment as a multi-stage defense. Most systems combine several methods for a reason—no single technique catches everything. Here’s the basic playbook.
1. Physical Barriers & Filtration
This is the first line of defense. It physically blocks particles based on size. We measure this in microns. A human hair is about 70 microns wide. A sediment filter might catch anything down to 5 microns. A high-end membrane for reverse osmosis can stop particles as small as 0.0001 microns—that’s good enough for most viruses.
It’s simple but critical. If you skip this step, larger gunk can clog or damage finer filters downstream. Always start with a pre-filter if your water has visible sediment.
2. Chemical Disinfection & Adsorption
Here, chemistry does the heavy lifting. Chlorine and iodine are classic disinfectants—they kill pathogens by disrupting their cell functions. Chlorine dioxide is another potent option. Then there’s adsorption, mostly via activated carbon. This stuff works like a magnet for certain chemicals, trapping chlorine, volatile organic compounds (VOCs), and bad tastes in its porous surface.
A quick note on maintenance: these chemical treatments have limits. Chlorine tablets expire. Activated carbon gets saturated. Knowing how often to change Brita filter cartridges is a perfect example—wait too long, and it stops working, potentially releasing trapped contaminants.
3. Advanced Purification
For the nastiest water or the purest output, you bring in the specialists. Reverse osmosis (RO) forces water through that super-fine membrane under pressure, stripping out almost everything. Ultraviolet (UV) light scrambles the DNA of microorganisms, rendering them harmless. Distillation boils water and re-condenses the steam, leaving most impurities behind.
These methods are powerful but come with trade-offs. RO wastes a lot of water. UV doesn’t remove chemicals. Distillation is energy-intensive. They’re often used together or after other stages to polish the water to a very high standard.
Key Benefits of Treating Your Water
Safety First: The primary benefit is removing health risks. Killing bacteria like E. coli and filtering out lead or arsenic can prevent serious illness. This is non-negotiable for untreated sources like wells, rivers, or during emergencies.
Better Taste and Odor: Chlorine, sulfur, and organic compounds can make water smell and taste awful. A good carbon filter solves this instantly. Honestly, this is why most people buy a filter—and that’s okay. Better taste means you’ll drink more water.
Protects Your Home: Hard water minerals scale up in pipes, water heaters, and appliances. A softener or conditioner prevents this. If you’re dealing with scale buildup, looking into a GE water conditioner or similar system can save you on energy bills and appliance repairs down the line.
Peace of Mind: Knowing your water is clean, whether from the tap or a trailside spring, is priceless. It’s about taking control of a fundamental resource.
Potential Drawbacks & Considerations
Cost: This can range from cheap tablets to multi-thousand dollar whole-house RO systems. The initial purchase is just the start. Factor in replacement filters, membranes, electricity, and water waste.
Complexity: Some systems are simple. Others, like a water boss water softener, require installation, programming, and regular salt top-ups. Be honest about your willingness to deal with upkeep.
Waste Streams: Reverse osmosis creates a brine reject water. Water softeners discharge salty backwash. This can be an environmental concern or a plumbing issue if not properly directed to a drain.
Over-Treatment: You can strip water too bare. Demineralized water from aggressive RO can taste flat and may leach minerals from pipes. Some systems add minerals back in for this reason.
Types of Water Treatment Systems
Point-of-Use (POU) Filters
These treat water at a single outlet. Pitcher filters, faucet-mounted filters, and under-sink systems are all POU. They’re affordable, targeted, and easy to install. Perfect for improving drinking and cooking water at one tap.
Point-of-Entry (POE) / Whole-House Systems
Installed where water enters your home, these treat every drop. They handle sediment, chlorine, hardness, and sometimes specific contaminants like iron. They protect appliances and provide treated water to every tap and shower. The design of a Whirlpool refrigerator water filter is a point-of-use example, but a whole-house system is a much bigger commitment.
Portable & Emergency Treatment
This is your camping and disaster preparedness kit. It includes pump filters, gravity bags, UV pens, and chemical tablets. They’re lightweight, require no power, and can be lifesavers. We never go on a backcountry trip without a backup method.
Specialty Systems
These target specific problems: UV purifiers for bacteria in well water, air-gap faucets for RO systems, or iron filters for rusty water. They’re often part of a larger treatment train. A TDS tester is an essential tool here—it helps you measure total dissolved solids to see if your specialty system is actually working.
Buying Guide: What Actually Matters
Forget the marketing hype. Focus on these four things.
1. Know Your Water: Get it tested. A basic test from a lab is worth the $20-50. It tells you exactly what contaminants you have. No point buying a chlorine filter if your problem is lead.
2. Check Certifications: Look for NSF/ANSI standards. Standard 42 covers aesthetic effects (taste, odor). Standard 53 covers health contaminants (lead, cysts). Standard 58 is for reverse osmosis systems. This is your guarantee of performance.
3. Calculate True Cost: Look at the filter replacement schedule and price. A cheap pitcher with expensive filters costs more over a year than a pricier system with affordable replacements. Do the math for 3-5 years.
4. Match Flow Rate to Need: A filter that slows your faucet to a trickle is infuriating. Check the gallons per minute (GPM) rating. For a whole-house system, ensure it can handle your home’s peak demand (e.g., two showers running).
Our Top Water Treatment Picks
Based on years of testing and reader feedback, these products deliver real value for specific situations.
| Product | Best For | Key Feature | Price |
|---|---|---|---|
 |
Travel & Camping | 1 tablet treats 1-2L, NaDCC chlorine formula | $14 |
 |
Emergency Kits | Ready in 30 minutes, kills waterborne organisms | $25 |
 |
Bulk Water Tanks | 1 tablet treats 250-500L, ideal for relief | $15 |
 |
International Travel | No iodine taste, includes neutralizer tablets | $38 |
Ef-Chlor 8.5mg Water Purification Tablets
These are my go-to for backpacking. The blister pack is tiny and light. Each tablet reliably treats clear water in my 1L bottle within 30 minutes. The taste is mild compared to iodine. For the price, you can’t beat the peace of mind for a weekend trip or as a backup in your glove box.
- Extremely compact and lightweight
- Effective NaDCC chlorine formula
- Treats 100-200 litres per pack
- Requires 30 min wait time
- Less effective on very cloudy water
Aquatabs Water Purification Tablets
Aquatabs are a staple in disaster relief kits for a reason. They’re straightforward and work fast. We’ve found them to be consistently effective against common pathogens. The 30-minute wait is reasonable. At $25 for 50 tabs, they’re a bit pricier per dose than some competitors, but the reliability is what you’re paying for.
- Fast-acting (30 minutes)
- Trusted brand in emergency response
- Kills a broad range of organisms
- Higher cost per tablet
- Only 50 tablets per pack
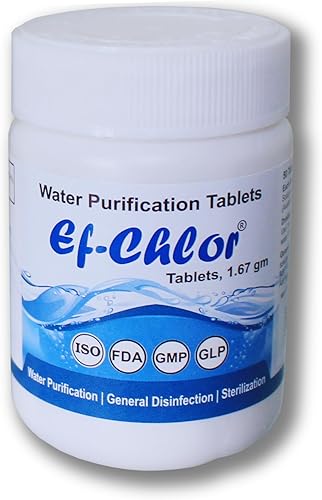
Ef-Chlor 1.67gm Bulk Treatment Tablets
If you have a rainwater tank or need to treat a large volume for a farm or relief camp, these are brilliant. One tablet treats up to 500 litres. It’s a “drop and forget” solution. We used these during a local flood response to sanitize stored water in food-grade drums. Simple, cost-effective, and scalable.
- Incredible value for bulk water
- Treats 250-500L per tablet
- Ideal for tanks and disaster prep
- Not for single-bottle use
- Requires a larger container
Potable Aqua Tablets with PA Plus
The classic. The two-step process (purification tablet then PA Plus neutralizer) is its killer feature. It removes the iodine taste and color completely. For international travel where water sources are questionable, this is what I pack. It’s more expensive, but the improved taste makes you actually use it, which is the whole point.
- Eliminates iodine taste/color
- Proven for international travel
- Two-bottle system is comprehensive
- Most expensive option here
- Two-step process takes longer
Water Treatment FAQ
- What is the most common method of water treatment?
- For municipal supplies, it’s a combination of coagulation, sedimentation, filtration, and disinfection (usually with chlorine). For home use, activated carbon filtration is the most common method, found in pitchers and fridge filters.
- Do I need a water treatment system if I have city water?
- Maybe. City water is treated to meet legal safety standards, but it can pick up contaminants in old pipes (like lead). It also contains chlorine for disinfection, which affects taste. A simple carbon filter can improve taste and reduce specific risks.
- How do I know what’s in my water?
- Get a certified lab test. Your city publishes an annual water quality report, but it only covers the water leaving the plant, not what comes out of your tap. For well water, annual testing is crucial.
- Are water purification tablets safe?
- Yes, when used as directed. They use carefully measured doses of chlorine-based compounds (like NaDCC) that are effective against pathogens and safe for human consumption at those levels. Always follow the instructions.
- What’s the difference between a water softener and a filter?
- A softener specifically removes hardness minerals (calcium, magnesium) through an ion-exchange process. A filter removes a broader range of contaminants like sediment, chlorine, or lead through physical or chemical means. They solve different problems.
- Can I use a water filter with a private well?
- Absolutely, and you often should. Well water isn’t municipally treated. You need to test it first, then choose a system that targets your specific contaminants, which often include bacteria, iron, manganese, or hardness.
Final Thoughts
Water treatment isn’t a one-size-fits-all purchase. It’s a solution to a specific problem. The backpacker needs a lightweight tablet. The homeowner with hard water needs a softener. The family on a well needs a tailored filtration system. Start by understanding your water, then match the technology to the task.
My strongest advice? Don’t overcomplicate it. For most people, a good carbon block filter for taste and a reliable set of purification tablets for emergencies covers 90% of needs. Invest in a quality system from a reputable brand, maintain it on schedule, and you’ll have great water for years. Stay curious, test your water, and drink up.